Overview
BT’s Cloud Contact PCI solution ensures that you can securely handle your customers’ payments without directly accessing sensitive card information. This not only enhances payment security but also improves your productivity by simplifying the payment process.
Get to know the payment page
- Secure mode indicates if the payment system is live or not.
- Sycurio CR (Call Reference) is a unique identifier assigned to each customer interaction.
- Amount, Currency and Cald Holder Name is something that you need to enter.
- Card Type is automatically generated when the Card Number is entered by the customer, then they will also need to enter the Security Code.
Note: The first 12 digits of the Card Number and the Security Code are hidden to preserve your customer’s security. - You will need to enter the Expiry Date.
How to do a payment
Activate secure payment
- Open the dial pad.
- Enter Sycurio CR number starting with the #.
The Sycurio CR number is in the first box on the payment page.
- After entering the number successfully, the Secure Mode will turn on.
Initiate payment
- Enter the Amount, choose the Currency, and enter the Card Holder Name.
- Then, ask the cardholder to enter the Card Number using the dial pad on their device, and wait for the green tick to appear.
- Then, ask the cardholder to enter the Security Code using the dial pad on their device, and wait for the green tick to appear.
- Ask for the Expiry Date and enter it.
- Click Submit.
Payment is done when Status is APPROVED on the results page returned.
Troubleshooting
Wrong card number and security code
If the cardholder has entered incorrect details, a red cross will appear next to the card number or security code field on your screen. To resolve this, simply click on the Reset button located next to the corresponding field to clear the error and allow for correct re-entry.
Now you just need to ask the cardholder to start re-typing the card details.
Line is cut
If the line is cut or the caller hangs up, the details will automatically be deleted so no card details are used.
If the caller calls back, a new payment page needs to be generated.
Typo in amount, wrong amount, or cardholder decides to use another card
In this case you can use the Restart button, which will vipe all details already entered. The Secure mode will not turn off, you can continue to add the details without the need to turning it on again.
How to create a payment link
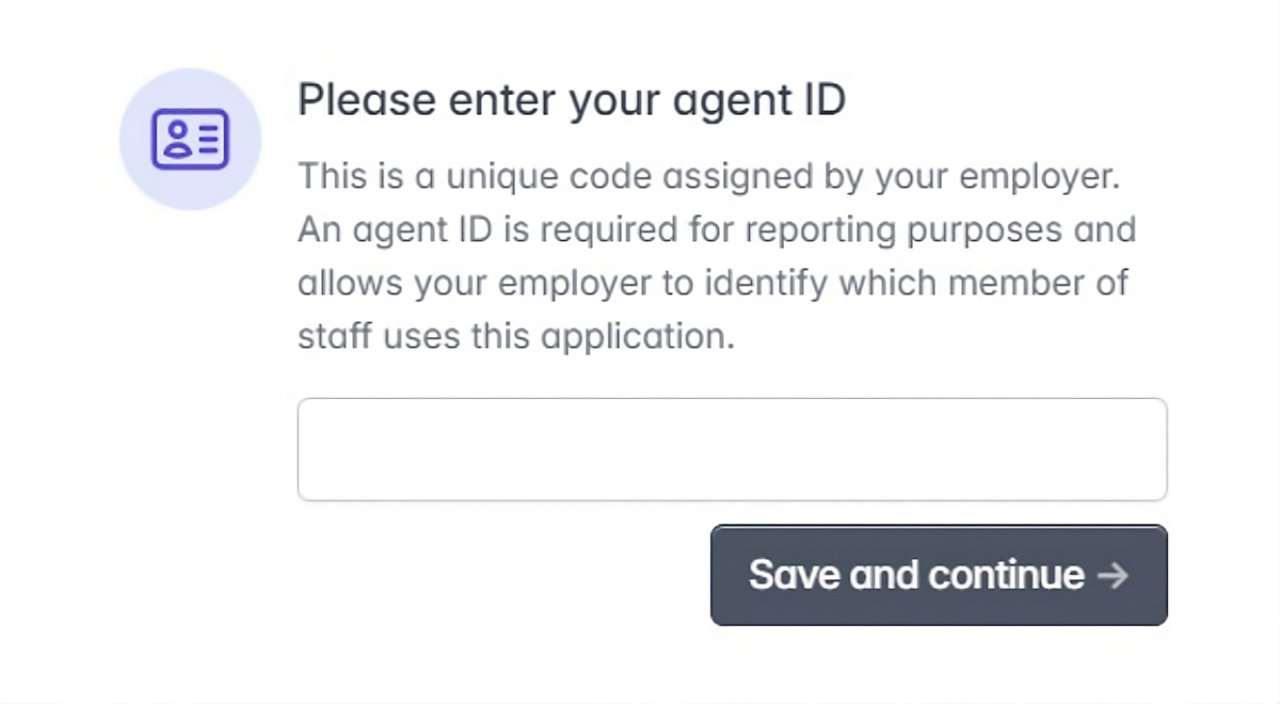
Open CCPCI Digital
- Open your browser.
- Navigate to the URL provided for CCPCI Digital to create a payment link.
- Enter your agent ID (a unique alphanumeric code assigned by your employer).
- Click Save and continue.
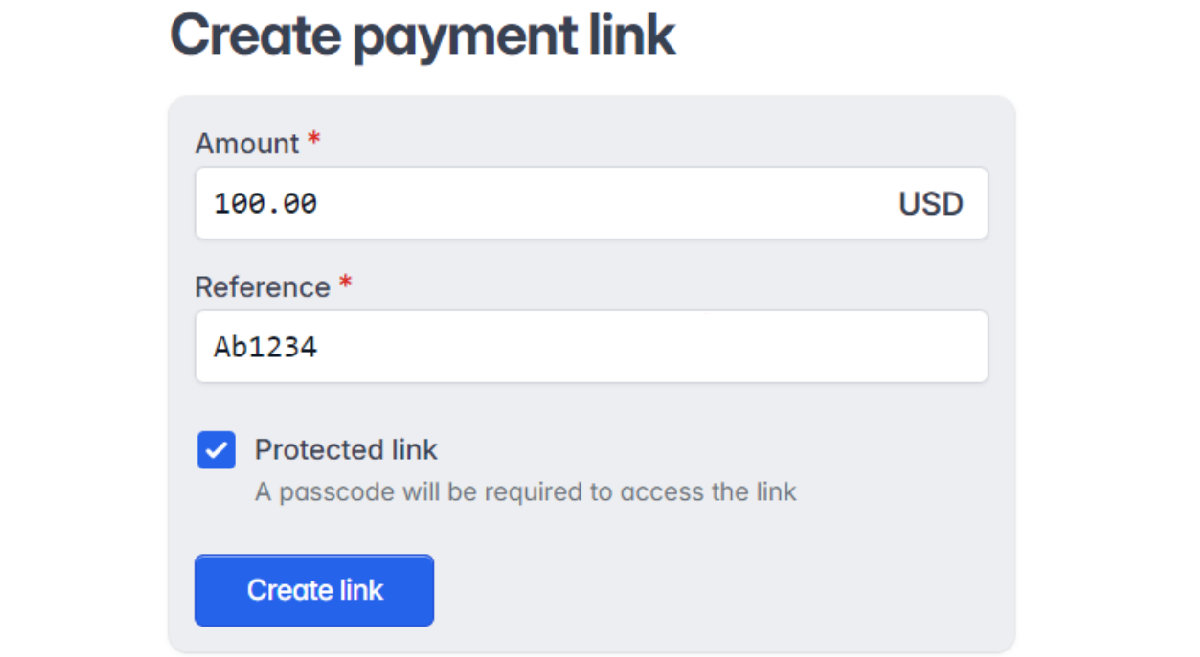
Create payment link
- Enter the amount your customer is paying in the Amount field.
- If multiple currencies are available, select the desired currency from the drop-down menu next to the Amount field.
- Enter any ID (up to 18 characters) in the Reference field to track or identify the specific case for the payment.
- For added security (optional), you can generate a Protected link. This will require a passcode to access.
- Click Create link.
What to do with the payment link
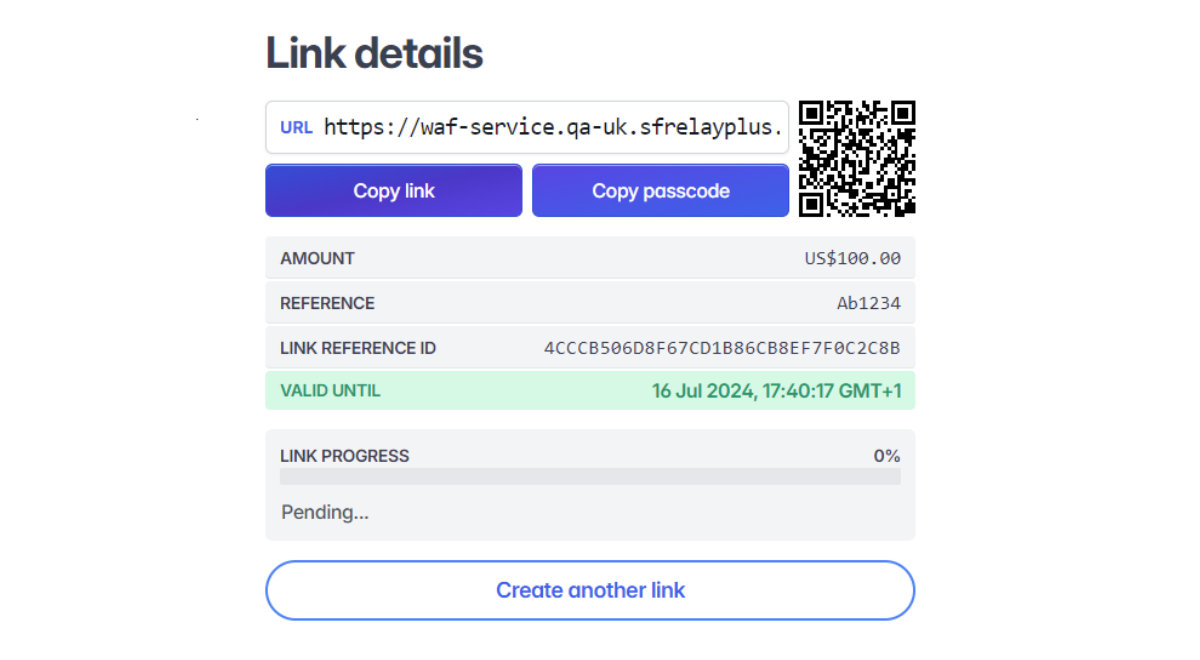
- Click "Copy link" to obtain the payment link.
Or, you can download the QR code and send it. - Paste the link into an email, SMS, or chat message, depending on the most convenient method for your customer
NOTE: If you've created a Protected link, click on Copy passcode to share the Link passcode with the cardholder. Otherwise, they will not be able to use the payment link (displayed only when you tick the Protected link option when creating the payment link).
- Send the link to your customer to facilitate timely payment.
- Monitor the link progress bar to track the real-time status of the payment completion.
NOTE:
- Verify the "Amount" and "Reference" fields to ensure the details are accurate.
- If needed, provide the customer with the Link reference ID.
- Note that the link has an expiration time. Once expired, the link will no longer be usable, and a new one must be created.
Link progress description
| Event order | Progress update message | Description |
| 1 | Pending | Link created but not accessed by the customer. |
| 2 | Customer prompted for passcode | Displays if the agent selects Protected link. |
| 3 | Link opened by customer | The payment page loads in the browser and customer selects paymanet type. For example: Apple Pay, Google Pay, PayPal or Credit/Debit Card. |
| 4 | Customer entering cardholder name | Cardholder's name field is active, customer is entering details. |
| 5 | Cardholder name entered | Information entered in the Cardholder's name field. |
| 6 | Customer entering card number | Card number field is active. |
| 7 | Card number entered | The complete card number entered in the card number field. |
| 8 | Customer entering expiry month | Expiry month drop-down list is active. |
| 9 | Expiry month entered | Expiry month selected. |
| 10 | Customer entering expiry year | Expiry year drop-down list is active. |
| 11 | Expiry year entered | Expiry year selected. |
| 12 | Customer entering security code | The customer enters the security code. |
| 13 | Security code entered | Security code entered. |
| 14 | Payment submitted | The payment request is sent to the payment provider. |
| 15 | Payment succeeded | Payment success message displayed for customer. |
| 15 | Payment failed | Payment failed message displayed for customer. |
Cardholder payment journey
NOTE: If you selected Protected link, the cardholder must enter and submit the Passcode to proceed to the Payment page.
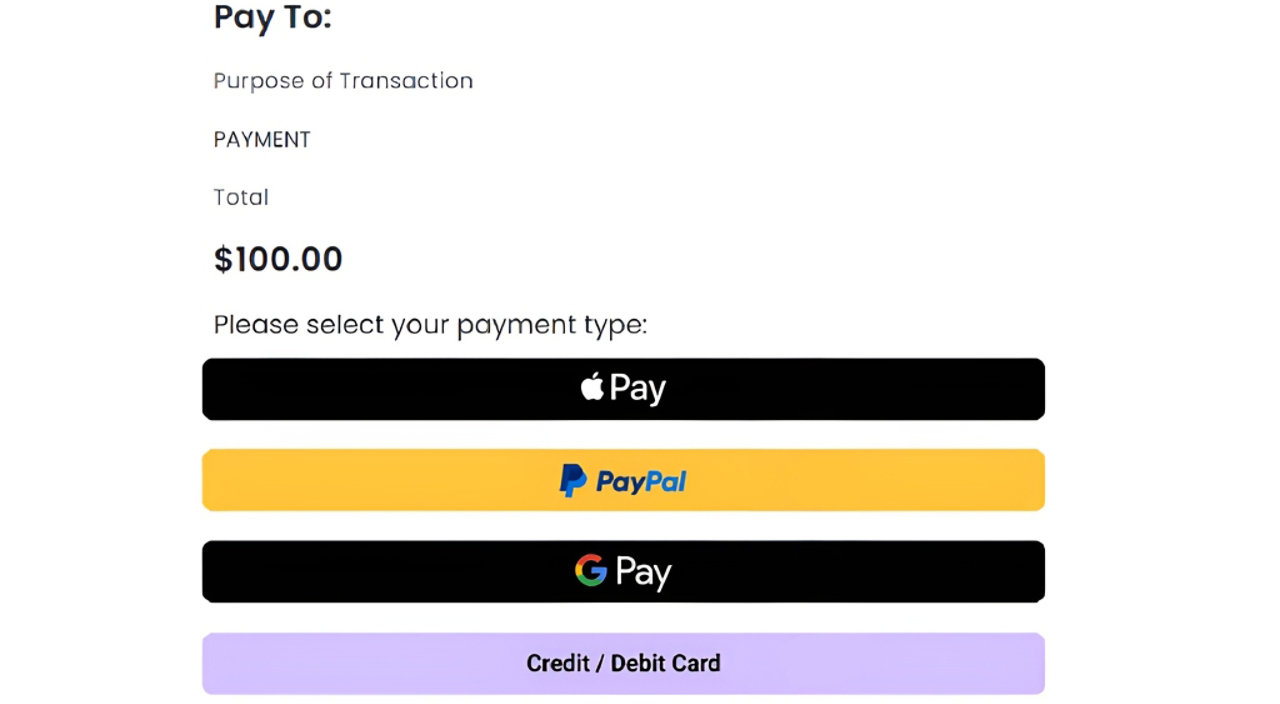
Opening the payment link
- The cardholder clicks on the link.
- The payment page starts with selecting the payment type.
- They will have to choose from the available methods.
- Appley Pay
- PayPal
- Google Pay
- Credit/Debit card
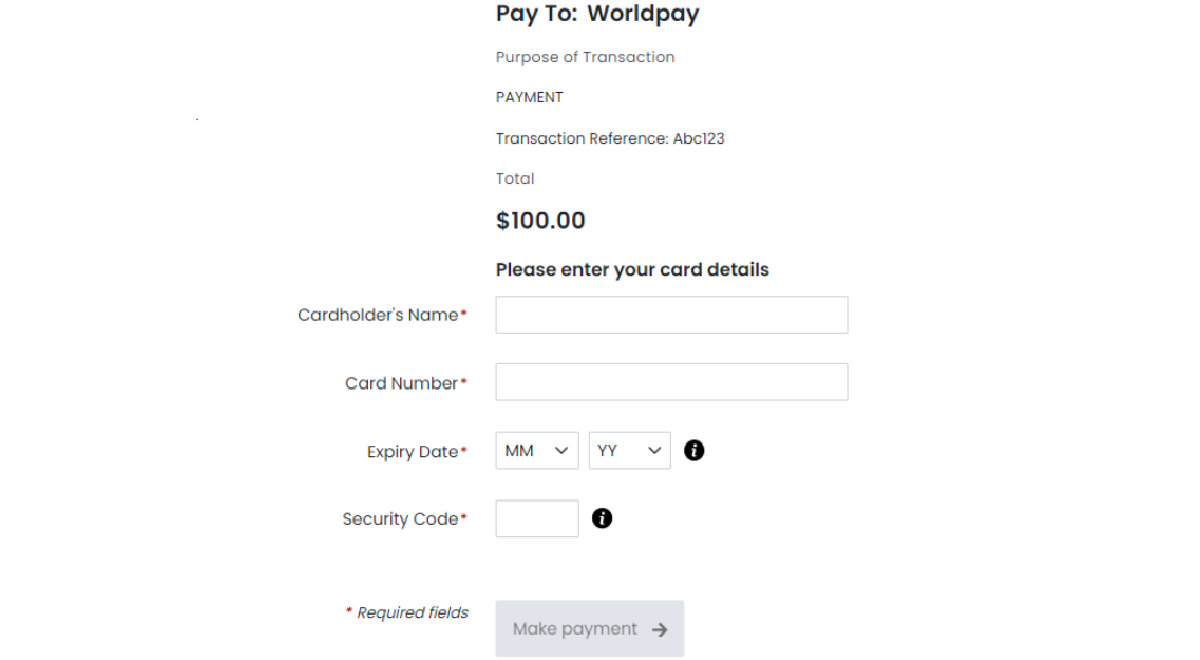
Payment page
- After the payment type has been chosen, the Payment page will load.
- Cardholder will need to enter their name, card number, expiry month and year, and the security code.
- After each item has been entered, the Make payment button will activate.
Successful/failed payment
If the payment is processed successfully, the cardholder will receive a confirmation message on their screen, indicating that the transaction was completed. In the event the payment is unsuccessful, the cardholder will be notified with a message clearly stating the payment failure. These messages ensure the cardholder is promptly informed about the status of their transaction.
What a successful payment looks like
Troubleshooting
Cardholder entering wrong card details
The Make payment button will turn on only if the cardholder types the correct card details as CCPCI is doing a background check while the details are being typed. An error message will be displayed in case the card details are not correct.
Cardholder can retype the card details, no need to create a new link, but you need to consider the expiration time of the payment link and if needed, create a new one and send it to the cardholder.
Insufficient funds
If the cardholder doesn't have enough funds, an unsuccessful payment screen will be displayed to the cardholder.
Payment link expires
Based on the system settings, all links have an expiration date and time, which may vary.
If it expires you'll need to click on Create another link and send the new link the same way you did with the first one.
