Setting up your Yealink CP925 Conference Unit on Digital Voice for Business
Get your Yealink CP925 Conference Unit set up and ready to use. Follow the steps on the page below to connect your phone and get started with Digital Voice for Business.
What's in the box?
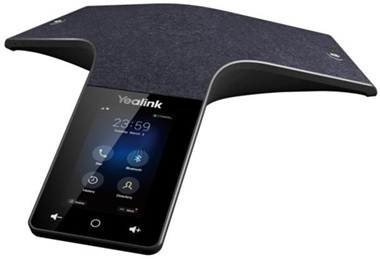
You should have:
- Yealink CP925 Conference Unit (pictured).
- Quick start guide.
- Ethernet cable.
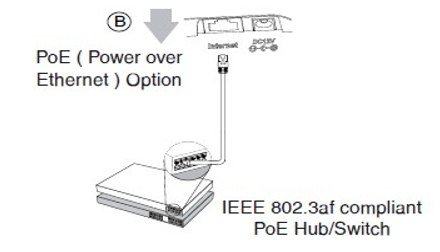
An optional YLPOE30 PoE injector is also available.
Set up your Yealink CP925 Conference Unit
Once you've unpacked your conference phone, turn it upside down so you can see the ports. You can connect your conference phone to your network using an Ethernet cable or Wi-Fi.
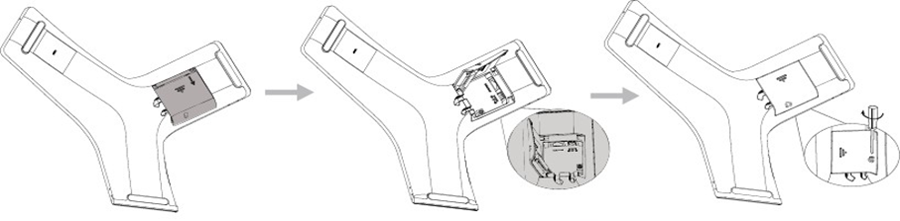
Connect using an Ethernet cable
Connect the Ethernet cable between the internet port on your conference phone and the relevant wall, switch or hub port.
Once it's connected to the network, your conference phone will automatically connect to Digital Voice for Business and download your telephone details. This might take a couple of minutes.
Connect using Wi-Fi
First, turn on Wi-Fi on your conference phone:
- Go to More > Basic > Wi-Fi.
- Turn Wi-Fi on.
- Select Save.
You can then connect to your Wi-Fi network manually or using WPS.
Connect to Wi-Fi manually
- Go to More > Basic > Wi-Fi.
- Select the Wi-Fi network you want to connect to.
- Enter the Wi-Fi password.
- Select Save.
Once your conference phone is connected to the network, it'll automatically connect to Digital Voice for Business and download your telephone details. This might take a couple of minutes.
Connect to Wi-Fi using WPS
Make sure Wi-Fi is turned on before you start.
- Go to More > Basic > Wi-Fi.
- Select WPS.
- Press and hold the WPS button on your router or hub.
- When the connection is successful, you'll see Connect Success on your conference phone.
You can also connect using WPS-PIN. Select WPS-PIN, then follow the instructions for your router or hub.
Check you're set up on Digital Voice for Business
Once your conference phone is connected to the network, it'll update its firmware. This might take some time.
When the update has finished, your conference phone will show that it's successfully connected. 
Once setup is complete, your phone will show the line number against a line key.
If something has gone wrong, you'll see an error symbol.  If this happens, call us on 0800 800 152 and we'll be able to help.
Help connecting using Wi-Fi
For help connecting using Wi-Fi follow the below steps.
My wireless network doesn't appear when scanning
Your router's SSID might be disabled. This means you'll need to add the wireless network manually.
Make sure Wi-Fi is turned on, then:
- Go to More > Basic > Wi-Fi.
- Select Known Network(s), then Add.
- Enter your router's SSID.
- Choose the appropriate option in Security Mode.
- Enter the network details needed for the security mode you've selected.
- Select Save.
How do I check my Wi-Fi connection and signal strength?
Go to More > Basic > Wi-Fi > Wi-Fi Status.
What Wi-Fi signal strength do I need?
A stronger Wi-Fi signal will give you a more reliable connection and better voice quality.
Your conference phone shows Wi-Fi signal strength from 1 to 4:
- 4: Excellent.
- 3: Good.
- 2: Weak.
- 1: Poor.
A signal strength of 3 or 4 is recommended for a reliable Wi-Fi connection and good voice quality.
If you're regularly having problems with voice quality, try connecting your conference phone to your router or hub using an Ethernet cable. This can help you work out whether the problem is with your Wi-Fi network.
Will my conference phone remember my Wi-Fi details?
Yes. Once you've successfully connected, your wireless network details are saved in Known Networks.
You can save up to five Wi-Fi networks. Your conference phone will automatically connect to the network at the top of the list.
If you've already saved five networks and want to add another, you'll need to delete one first. In Known Networks, select Option, then Delete or Delete All.
How do I switch from Wi-Fi to an Ethernet connection?
First, turn off Wi-Fi:
- Go to More > Basic > Wi-Fi.
- Turn Wi-Fi off.
- Select Save.
You can then connect your conference phone to your network using an Ethernet cable.
My broadband is connected and Wi-Fi seems OK, but I'm still having problems
Try turning Wi-Fi off and back on again:
- Go to More > Basic > Wi-Fi.
- Turn Wi-Fi off and select Save.
- Turn Wi-Fi back on.
- Select Save.
Your conference phone will automatically try to reconnect to your Wi-Fi network.
Wi-Fi interference can also affect your connection. This can be caused by other wireless devices, electrical appliances, nearby Wi-Fi networks and some building materials.
You can try:
- Moving your router away from other routers, electrical appliances, wireless devices and dense building materials.
- Unplugging appliances and devices when you're not using them.
- Avoiding using lots of wireless devices close together at the same time.
- Trying a different wireless frequency or band, such as 5 GHz instead of 2.4 GHz.
- Using a Wi-Fi extension solution if you need to improve coverage.
Want to learn more?
More about your Yealink CP925 Conference Unit
For more information about using your conference phone, including making and answering calls, transferring calls, conference calls, Do Not Disturb, call history, contacts and voicemail:
View our Yealink CP925 Conference Unit user guide (PDF, 595KB).
More about Digital Voice for Business
Now your conference phone's all set up, learn more about using your digital phone service in our Digital Voice for Business help guide.